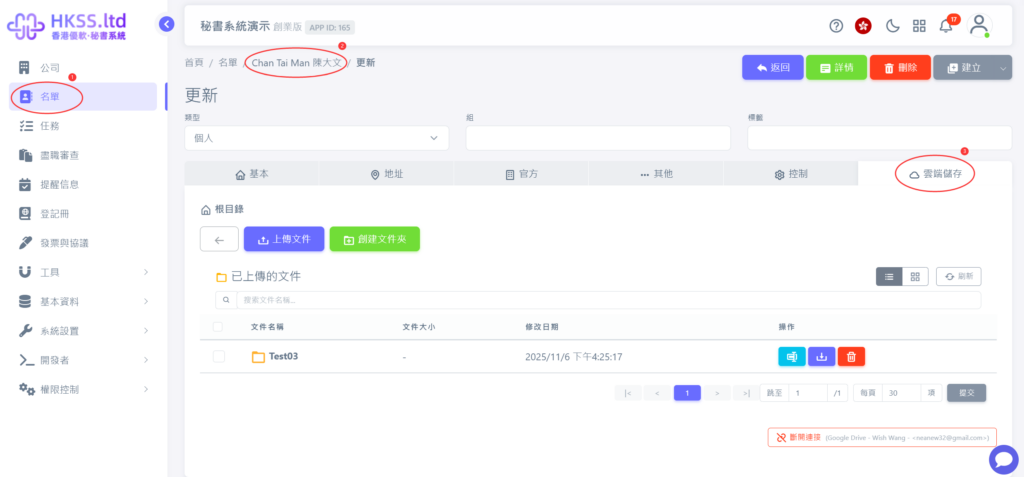
This tutorial guides you to connect cloud storage to the system for managing client identity files, invoices, and agreements.
Preparation
- Prepare one cloud drive account. Currently supported: Google Drive, OneDrive, and Dropbox (FTP is under development).
Step-by-Step
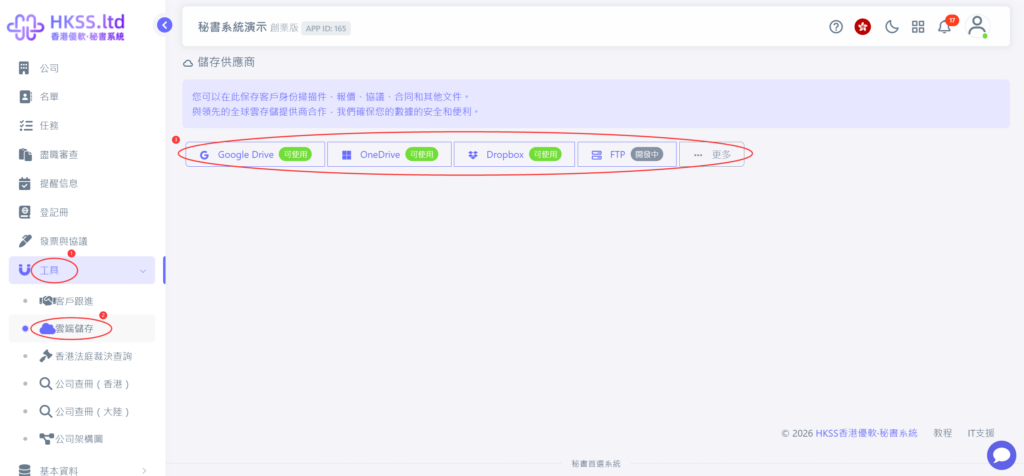
- Click "Tools" => "Cloud Storage" in the left menu.
- Select a cloud provider as needed. In this example, click "Google Drive".
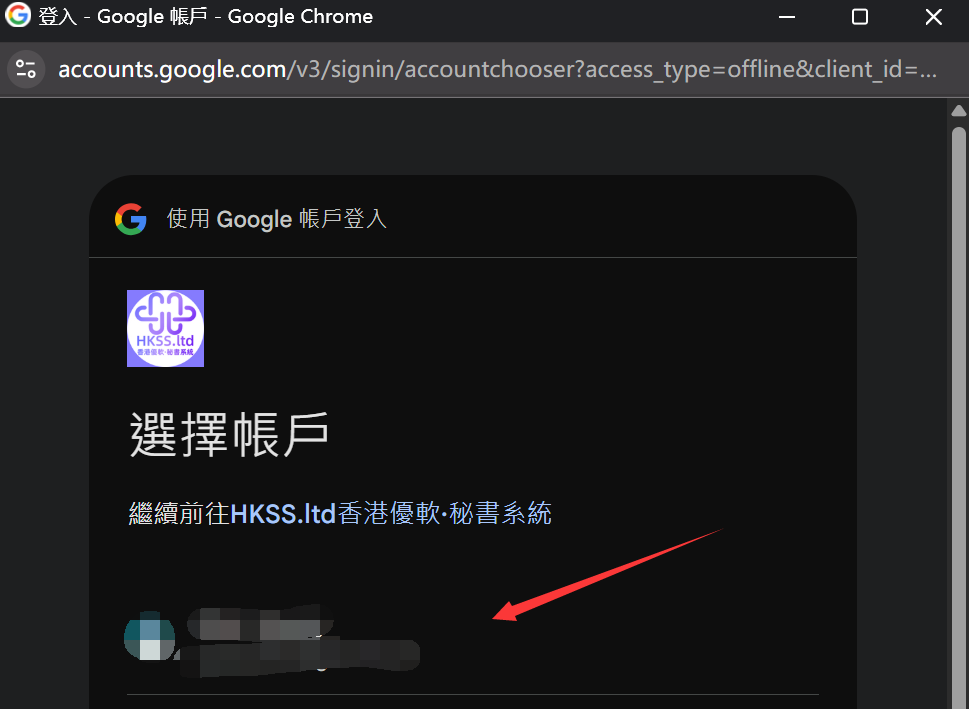
- A popup window appears. Choose the account for your cloud drive (or sign in first).
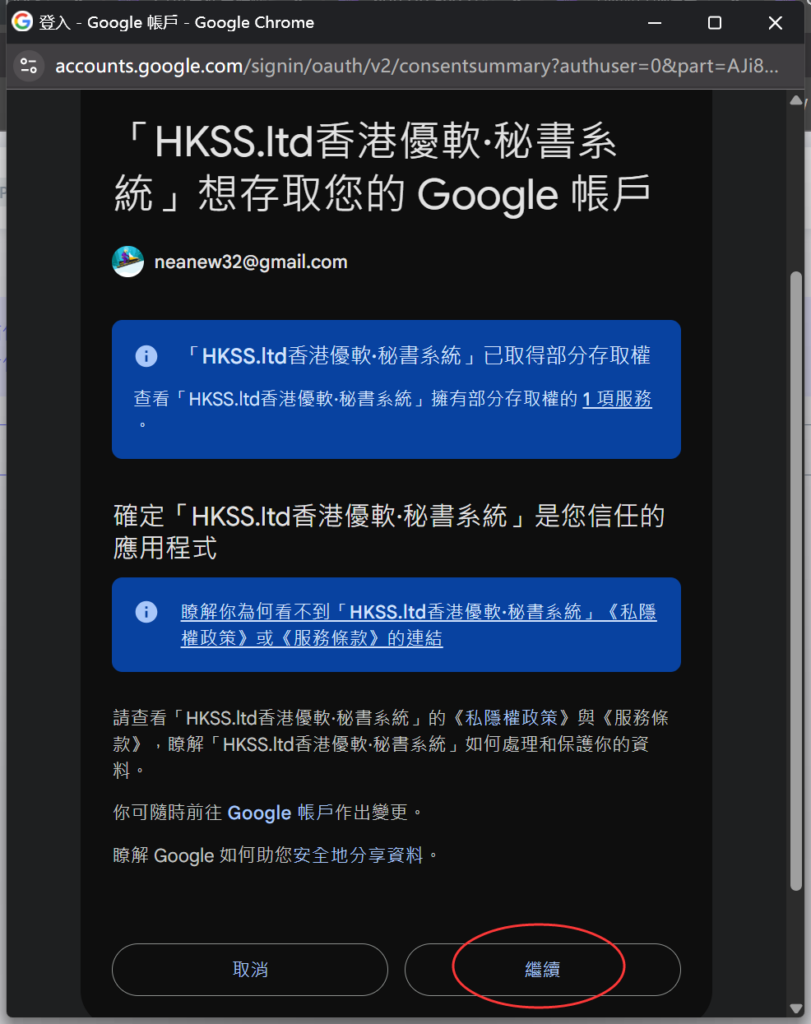
- If you agree to authorize system access, click "Continue".
- After authorization is completed, you will see the connected status page (you can click "Disconnect" to revoke authorization).
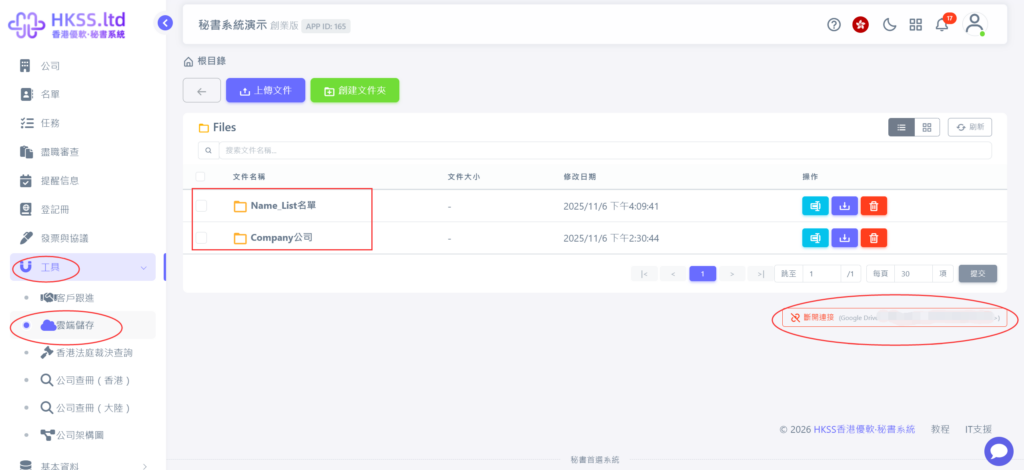
At this point, cloud storage authorization is completed.
Notes:
- The system creates two folders in your cloud root directory: "Name List" and "Company".
- Do not rename or delete these two folders, otherwise files may be lost.
- Cloud storage is available in both the "Name List" and "Company" modules for easier document management.
- To open a folder, double-click the folder name.
- Use case (Company files): store agreements, contracts, and quotations via "Company" => "Update" => "Cloud Storage".
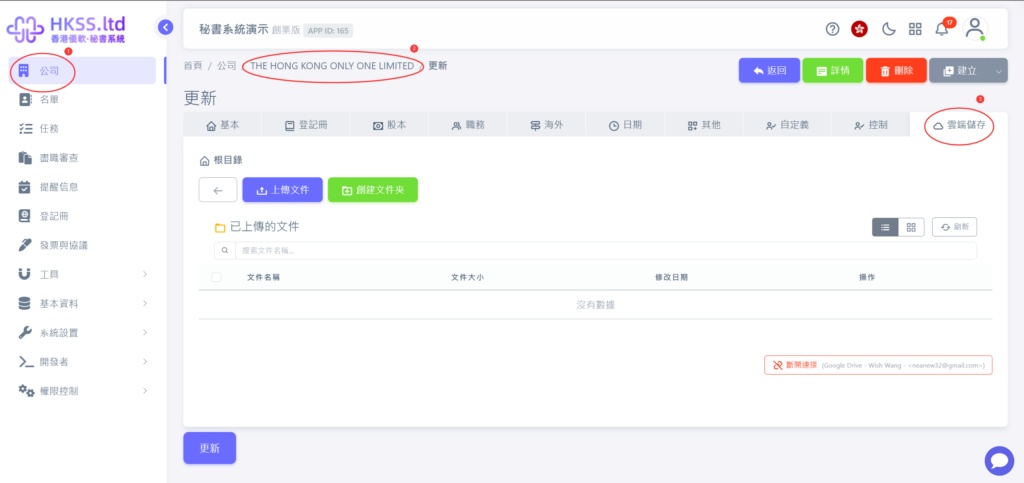
- Use case (Name List files): store ID cards, passports, and signatures via "Name List" => "Update" => "Cloud Storage".